Friday, December 28, 2012

It Is Really An Easy Mango Pudding Recipe

Now you can make Thai Dessert at your home any time.Here some Thai Dessert Recipe for you.What makes it extra good is the fact that it is made with coconut milk instead of whipping cream or evaporated milk. Unlike dairy products, coconut milk brings out and enhances the taste of the mango, plus adds that touch of richness you're looking for in a pudding. Here is an easy mango pudding recipe below:


Ingredients:
  • 2 medium to large ripe mangoes
  • 1 packet gelatine
  • 1/2 cup hot water
  • 1/3 cup white sugar
  • 1 cup good-quality coconut milk
Preparation:
  1. Make sure your mangoes are ripe - the fruit should be bright orange or yellow and fairly soft. Scoop out the fruit, including around the stone. Place the fruit in a food processor or blender and blitz to create a smooth mango puree. Leave the mango in the processor/blender.
  2. In a saucepan, heat up the water until it reaches a rolling bowl. Remove from heat. While stirring the water with a whisk or fork, sprinkle the gelatin over the surface of the water and stir briskly in order not to have any lumps.
  3. Add the sugar to the hot water/gelatin mixture and stir to dissolve.
  4. Add this mixture to the mango in the food processor/blender. Also add the coconut milk. Blitz briefly until ingredients are combined.
  5. Pour into dessert bowls or cups and place in the refrigerator for at least 2 hours (or up to 24 if making ahead of company coming). Serve cold on its own, or with some fresh fruit, and ENJOY!

Thursday, December 20, 2012

How To Make Yogurt And Fruit Cake Easily

To delight the taste buds of your guests, nothing is better than to make the cake yourself. Leave the traditional chocolate cake and delight your guests by making a cake with yoghurt and berries.

Recipe for yogurt cake with berries and a recipe is relatively simple to make and everyone beginners. It will take about twenty minutes to make the cake batter yogurt and about thirty minutes to cook this wonder. Before starting the recipe for yogurt and fruit cake, preheat your oven to 180 ° C.


Ingredients and utensils:
  • Before anything else, it is essential to prepare the list of ingredients. Recipe for yogurt cake with berries and requires the following ingredients: A yogurt (you can focus on a 0% yogurt to lighten the recipe or yogurt with berries), two egg yolks, two egg whites, a yoghurt pot with oil, three flour yogurt, a yogurt pot caster sugar, a packet of vanilla sugar and a packet of yeast and 450 grams of red fruits.
  • To complete the recipe for yogurt cake and berries, you’ll need a drummer and a cake pan.
Making:
  • To start cake recipe yoghurt and berries, pour into a large container, plain yogurt or yogurt with berries and then dilute it with all the oil pot and the pot of caster sugar, the three jars of flour and yoghurt sachet of yeast. Separate the white from yellow. Put the yolks in the above mixture and put a pinch of salt in the blanks as you go in snow.
  • Stir in egg whites and mix in preparation for a smooth paste then add the berries. Butter the mold and pour the batter. Bake for about 30 minutes.
Tips:
  • The red fruits are available at a certain time of year. Thus, to make the recipe for yogurt cake and berries in the summer season not, you can buy packages of frozen berries to your supermarket shelf as usual.
  • Moreover, nothing prevents you to replace the berries with red fruit jam. In this case, instead of adding 450 grams of red fruit, it will put four large tablespoons of red fruit jam.

Thursday, December 13, 2012

It Is Really A Perfect Pumpkin Cheesecake Recipe

This pumpkin cheesecake recipe is really a perfect dessert. I'm not a big fan of pumpkin pie, but I love pumpkin cheesecake! This pumpkin cheesecake is the best pumpkin cheesecake I ever tasted. When I made this pumpkin cheesecake recipe for the first time, it was my first time ever making any kind of cheesecake, and it came out perfectly! I was brave enough to test this new recipe for Thanksgiving, and I also made a classic apple pie as a backup plan, and as a result I had 2 wonderful desserts for all the guests to enjoy!


Best Pumpkin Cheesecake Recipe

Ingredients:

CRUST:
  • 1 3/4 cups graham cracker crumbs
  • 3 tbsp sugar
  • 1/2 tsp cinnamon
  • 1 stick (1/2 cup) butter, melted
  • FILLING:
  • 3 packages (8 oz each) cream cheese, brought to room temperature
  • 1 can (15 oz) pumpkin puree
  • 3 eggs + 1 egg yolk
  • 1/4 cup sour cream
  • 1 1/2 cup sugar
  • 1 tsp vanilla
  • 1 tsp cinnamon
  • 1/8 tsp nutmeg
  • 2 tbsp flour
Instructions:
  1. Preheat oven to 350F. Put a pan of water in the oven on the bottom shelf and keep it there the whole time while the cheesecake is baking. Spray the 9-inch non-stick springform pan with non-stick cooking spray.
  2. Make the crust: Mix graham cracker crumbs, sugar and cinnamon. Add melted butter and mix until combined. Press the crust into the sprinform pan and set aside.
  3. Make the filling: In a large bowl, put cream cheese, pumpkin puree, eggs, sour cream, vanilla, sugar, spices and flour. Mix together with a mixer until the mixture is evenly colored and smooth.
  4. Pour the filling into the crust. Put in the oven and bake for 1 hour.
  5. Remove the pumpkin cheesecake from the oven and let rest for 1 hour to cool down. Cover with plastic wrap and refrigerate for at least 4 hours.

Thursday, December 6, 2012

A Real Nagasaki Castella Recipe

True real Nagasaki Castella does not contain any added oil, which makes Ong's recipe unique. There are also several other techniques in traditional Castella that I don't use here: sprinkling the batter with coarse sugar that settles at the bottom and makes a dark, sweet bottom crust, taking out the cake halfway through baking and disturbing it to destroy the air bubbles and make the cake dense, and baking in a covered container to steam the cake. You will also notice there is a slight fall in the cake, which creates a raised rim of crust. This didn't bother me, but if you don't like the effect, you can cool the cake upside-down: just be careful to do so on a greased surface so you won't lose any of the precious crust.


Ingredients:
  • 88g (1/2 cup + 2 tablespoons) all-purpose flour
  • 3 large eggs, at room temperature
  • 1 large egg yolk, at room temperature
  • pinch of salt
  • 126g (1/2 cup + 2 tablespoons) granulated sugar
  • 42g (1 tablespoon + 2 teaspoons) honey
  • 22g (1 tablespoon + 2 teaspoons) canola or other neutral oil
Preheat the oven to 175°C. Spray an 8-inch round pan with baking spray and line the bottom and sides with parchment. Don't spray the parchment after lining. Sift the flour onto a sheet of wax paper or a bowl and set aside. In a heatproof bowl, add the eggs, egg yolk, salt, sugar, and honey. Place this over a saucepan of simmering water and beat on medium speed with a hand mixer for 10 minutes. Take off the heat and beat on high speed for at least 6 more minutes using a hand mixer. The batter will be cool, pale and form very thick ribbons that take a very long time to sink completely into the surface of the batter.

Gently fold in the flour into the batter in 3 additions. Take about 1/2 cup of the batter and whisk it into the oil until completely homogeneous, then drizzle it back into the batter, folding continuously as you add it.

Pour the batter into the prepared pan and bake for 20 minutes, then turn the heat down to 150°C and continue baking for 18-25 more minutes, or until a toothpick inserted into the center comes out with a few very fine crumbs. Cool the cake completely. Unmold to a serving platter.

Thursday, November 29, 2012

Why Not Try This Yule Log Recipe

Yule Log, this delectable chocolate and cream sponge cake is ideal to serve over the Christmas period. You can also try to make this attractive cake at home follow these steps.


What you need:
  •  5 eggs, separated
  • 1 cup sugar, divided
  • 1/2 cup cake flour
  • 1/4 cup baking cocoa
  • 1/4 teaspoon salt
  • 1/2 teaspoon cream of tartar
MOCHA CREAM FILLING:
  • 1 cup heavy whipping cream
  • 1/2 cup confectioners sugar
  • 1-1/2 teaspoons instant coffee granules
  • MOCHA BUTTERCREAM FROSTING:
  • 1/3 cup butter, softened
  • 1/3 cup baking cocoa
  • 2 cups confectioners sugar
  • 1-1/2 teaspoons vanilla extract
  • 1 tablespoon brewed coffee
  • 2 to 3 tablespoons milk
What you do:
  1. Line a 15-in. x 10-in. x 1-in. baking pan with grease proof paper; grease the paper. Place egg whites in a small bowl; let stand at room temperature for 30 minutes.
  2. In a large bowl, beat egg yolks on high until light and fluffy. Gradually add 1/2 cup sugar, beating until thick and lemon-colored. Combine the flour, cocoa and salt; gradually add to egg yolk mixture until blended.
  3. Beat egg whites on medium until foamy. Add cream of tartar; beat until soft peaks form. Gradually add remaining sugar, 1 tablespoon at a time, beating on high until stiff peaks form. Stir a fourth into chocolate mixture. Fold in remaining egg whites until no streaks remain.
  4. Spread batter evenly in prepared pan. Bake at 350° for 12-15 minutes or until cake springs back. Cool for 5 minutes; invert onto a linen towel dusted with confectioners' sugar. Peel off parchment paper. Roll up in the towel, starting with a short side. Cool on a wire rack.
  5. In a large bowl, beat cream until it begins to thicken. Add sugar and coffee granules. Beat until stiff peaks form; chill. Unroll cooled cake; spread filling to within 1/2 in. of edges. Roll up again. Place on serving platter; chill.
  6. In a large bowl, beat frosting ingredients until smooth. Frost cake. Using a fork, make lines resembling tree bark.

Wednesday, November 21, 2012

It Is Really A Classical Black Forest Cake Recipe

I have been a true lover of Black Forest Cake for a very long time. A simple chocolate cake with luscious whipped cream frosting and adorned with cherries, this cake speaks of deliciousness and elegance in every bite. This is a very simple cake to make, just a few simple steps and this baby comes together real easily. Also you can use fresh cherries if you like here.


Ingredients:

Cherries-
  • 24 ounce (700 ml) jar of Morello Cherries in syrup
  • 4 tablespoons Kirsch or Cherry Brandy
  • 1/4 cup (50 grams) granulated white sugar
Chocolate Genoise-
  • 3 tablespoons (42 grams) hot melted unsalted butter
  • 1/2 cup (60 grams) cake flour
  • 1/4 teaspoon salt
  • 1/3 cup (30 grams) unsweetened regular or Dutch-processed cocoa powder
  • 4 large eggs
  • 2/3 (135 grams) granulated white sugar
  • 1 teaspoon pure vanilla extract
Whipped Cream Frosting-
  • 2 1/2 cups (600 ml) heavy whipping cream
  • 1 teaspoon pure vanilla extract
  • 3 tablespoons (35 grams) granulated white sugar
Instructions:

Cherries-

Drain the cherries, reserving the liquid. Place the cherries in bowl and toss with 2 tablespoons Kirsch. Cover the bowl and toss with 2 tablespoons Kirsch. Cover the bowl with plastic wrap and set aside. Place 1 cup (240 ml) of the reserved cherry syrup in a small saucepan, along with the sugar and heat until sugar has dissolved. Remove from heat, add 2 tablespoons Kirsch, and let cool.

Chocolate Genoise-

Preheat oven to 350 degrees F (180 degrees C). Butter or spray, a 9 inch round cake pan and line the bottom of the pan with parchment or wax paper. In a bowl, sift the flour,salt and cocoa powder. In a heatproof bowl whisk the eggs with the sugar. Place over a saucepan of simmering water, and whisking constantly, heat until lukewarm (about 5 minutes). Remove from the heat and transfer to the bowl of your electric mixer. Beat on high speed until the mixture is thick (about 5 minutes) (the batter will fall back into the bowl in a ribbon-like pattern). Beat in the vanilla extract. Then sift about one-third of the flour mixture over the egg mixture and gently fold in using a rubber spatula or whisk.Sift and fold in another third, and the fold in the rest. Take 1 cup of the batter and fold it into the melted butter (to lighten it). Then gently fold it into the egg batter. Pour into your pan, smoothing the top. Bake for about 20-25 minutes or until a toothpick inserted into the center comes out clean (cake starts to shrink from the sides of pan). The cake can be stored for two days or frozen for a month.

Whipped Cream Frosting-

In your mixing bowl place the whipping cream,vanilla extract and sugar and stir to combine. Cover and chill the bowl and the wire whisk in the refrigerator for at least 30 minutes, then beat the mixture just until stiff peaks form.

Assemble Cake-

Using a sharp knife cut the genoise, horizontally, into two layers.Turn over the top layer of the cake (top of the cake becomes bottom) and place on your serving plate. Brush the cake layer with 1/4 cup (60 ml) cherry syrup. Take 1 cup of whipped cream and spread on the moistened genoise. Place the cherries evenly over the cream. Brush the cut-side of the second genoise layer with 1/4 cup of the syrup. Place cut-side down on top of the cherries,gently pressing to compact. Reserve one cup (240 ml) of whipped cream and spread the remaining cream over the top and sides of the cake. Place the reserved cream in a pastry bag fitted with large star tip and pipe rosettes on the top of cake. Cover and refrigerate the cake for several hours (or overnight) before serving. Decorate with fresh cherries and shaved chocolate.

Wednesday, November 14, 2012

This Is A Detailed Blueberry Butter Cake Recipe

This blueberry butter cake was moist, soft and buttery. It's not a new recipe, I baked it before. If you would like to give this recipe a try, there is a detailed recipe.


Preparation:
  • Preheat oven at 170*C for 15 mins.
  • Prepare 1 loaf pan (8"*3") and 1 small loaf pan (6" x 2.5").
Ingredients:

- 190g butter
- 150g caster sugar
- 1 1/2 tsp elmusifer
- 3 eggs (60g each), slight beaten
- 210g cake flour
- 3/4 tsp baking powder
- 45g milk
- 20g condense milk
- 100g blueberry pie filling

Method:
  1. Beat butter, sugar and elmusifier on high speed for 5 mins till fluffy and light.
  2. Add eggs into few portions gradually at low speed and mix well.
  3. Fold in flour and baking powder with spatula (if use mixer, pls use the lowest speed) alternate with milks. Mix till well incorporated.
  4. Pour half of the batter into greased mould. Cover with blueberry filling and pour reamaining batter over filling with spatula. Gently swirl batter for marbeled effect.
  5. Bake at 170*C for 35-40 mins or till cooked.

Wednesday, October 31, 2012

Black Bean Chocolate Cake

This recipe is my very own all time favourite cake recipe. It's presence in our fridge is almost as common as milk and eggs, and I kinda always feel like having just a little piece with a cup of coffee. Besides the fact that it is moist and has a rich, deep chocolate flavour, this cake is almost healthy enough to eat as a breakfast.


Black bean chocolate cake:
  • Makes 1 loaf
  • 1 cup cooked black beans
  • 3 large eggs1/2 cup/100 g sugar
  • 3 heaping Tbsp cocoa powder
  • 1/2 cup/50 g dark chocolate 70%
  • 1 tsp instant coffee or 1 espresso shot
  • 1/2 vanilla pod, scraped
  • 1 tsp baking soda
  • Juice and zest from 1/2 organic orange
  • A pinch of salt
Directions:

1. Preheat the oven to 350 °F/175 °C

2. In a blender combine all of the ingredients, except the dark chocolate. Blend until it is smooth and free of any lumps.

3. Pour the batter into a parchment lined loaf pan. And yes the batter is very liquid-y. Chop the dark chocolate and spread it across the surface, some of the chunks should fall into the batter or else help it with a teaspoon, in order to get chocolate inside the cake as well.

4. Bake the cake for approximately 35 min, and set a side to cool completely before removing it from the pan

Friday, October 19, 2012

There Is A Light Fruit Cake Recipe

For those who prefer a light fruit cake recipe, this one is time tested and tasty. This cake is filled with goodies like coconut, pineapple and cherries. It's a real crowd pleaser, and not just for Christmas.


Prep time: 20 minutes

Cook time: 3 hours

Ingredients:
  • 2 cups all purpose flour
  • 1 teaspoon salt
  • 1 teaspoon baking powder
  • 3 cups shredded coconut
  • 1 1/2 cups candied cherries, cut in halves
  • 1 1/2 cups candied pineapple, diced
  • 1 1/2 cups white raisins
  • 1 1/2 cups slivered, blanched almonds
  • 2 cups sugar
  • 1 cup butter
  • 4 eggs
  • 1 teaspoon almond extract
  • 1 cup pineapple juice
Directions:
  • Line 9" or 10" tube pan with two thicknesses of buttered brown paper.
  • Measure flour (without sifting) into a large bowl. Add salt and baking powder. Stir well to blend. Add coconut, fruits and nuts. Mix until fruit is separated and coated with flour.
  • Cream sugar, butter, eggs and almond extract together thoroughly.
  • Stir in fruit and flour mixture alternately with pineapple juice, starting and ending with the fruit and flour mixture. Spread batter evenly in the prepared pan.
  • Preheat oven to 275°F.
  • Bake for 3 to 3 1/3 hours. Keep a pan of hot water in bottom of the oven while baking. When baked, leave the cake in pan until it has cooled. Remove the paper liner and wrap the cake in foil. Store it in the refrigerator or a cool place.
Fruit Cake Glaze:
  • Combine 1 cup sugar, 1/2 cup water and 1/3 cup light corn syrup in a sauce pan. Stir over low heat until sugar is dissolved, then boil to firm ball stage (242°F on a candy thermometer).
  • Brush the hot glaze over the cooled cake. Decorate top with candied cherries and nuts and brush cake again with hot glaze. Let dry thoroughly before wrapping and storing.
  • Makes one large cake or can be baked for a shorter time in small cake tins.

Tuesday, October 16, 2012

Nothing Better Than A Delicious Cake

Who doesn’t like cakes, every one does, and perhaps it’s the most loved dessert in the world. I have never met a person who hates cakes, probably someone does have likes and dislikes for a special type of cakes, but have you ever met a person who would say I don’t like cake as the broad category itself.
The value of cake as a highly regarded dessert can be observed in our routine lives. You would have never seen any birthday or an anniversary party without a cake? In fact if there is no cake, there are no birthdays or anniversaries at all, right?
Undoubtedly cakes are the most preferred choice anywhere and are even now very professionally sub-classified into categories like wedding cakes, birthday cakes and anniversary cakes. We see bakers specializing in wedding cakes only and if you would ask them that you want a cake for birthday they would refer you another specialist in birthday cakes.
Cakes have this soft creamy taste, with delectable and appetizing feel. The smell in bakeries or the fragrance while the cake is baked reluctantly creates desires for it, whether you had ten chickens in your lunch and you are stuffed up to your throat.
Fragrance and taste of a cake is one thing but talking about cakes itself bring a mouth-watering experience due to gigantic cake types and flavors. Cakes happen to have incorporated every flavor you can think of.
You name a flavor and cake is here, there are chocolate cakes and then chocolates cakes have further hundred divisions like chocolate cream, chocolate fudge, chocolate moose and etc. Similarly other cakes can be found in variety of flavors categories like Coffee cake, Lemon tart, apple cake, Black forest, Butter cake, Cheese cake, Pineapple Cake, Angle food, Bakewell tart, Battenburg, Bundt cake, Carrot cake, Butterfly cake, Date & Walnut Loaf, Chiffon cake, Croquembouche, Devil’s food cake, Dobos cake, Eccles cake, Fruit cake, Icecream Cake, Jaffa Cake, Lamington, Marble Cake, Kendal Mint Cake and etc.
Most chances are that you would have never even heard of these names before, but the fact is that the names above are just a mere synopsis of the wide and vast range of cake’s flavors around the world. Don’t beat yourself to it, if you have never heard of the names above because most of these cakes’ types discussed are available in their specific region and countries.
The concept of cake has been changed with respect to its tastes, designs and presentations. Now we have brands associated with cakes, we see names in market with unprecedented reputes and image in making the most luscious cakes having striking designs and stunning presentations.
I belong to Pakistan, and I see so many bakers’ brands with their own specialties in cakes. The development in cakes industry is outcome of lots of societal factors. Cakes bring easiness as a dessert and as a standard gift. You wana wish someone for birthday or anniversary, and if you can’t get suitable gift for any occasion. This is where a cake comes in; the best thing about a cake is you can send it as gift to anyone on any special occasion.

Tuesday, July 10, 2012

Follow This Blue Berry Cake Recipe If You Love Cake

Blue berries are the most popular fruit in the hot summer, because of its bright color and special flavor, a lot of people are addicted in it very much. Blue berries are also widely used in a lot of kinds of desserts, such as pudding, cheess, cake and whatever you can imagine, I think that blue berry cake is the most delicious cake in this hot season, and i also make it at home by myself. There is an easy recipe, you can make it at your own kitchen.


Ingredients

1 cup all purpose flour plus 1 teaspoon of flour (plus more for prepping cake pan)

1 teaspoon baking powder

1/2 teaspoon salt

4 oz (1 stick) unsalted butter, softened

1 cup sugar

1/4 teaspoon vanilla

2 large eggs

2 cups blueberries, rinsed and drained (if using frozen blueberries, thaw and drain first)

1 teaspoon lemon juice

Powdered sugar for dusting

Method

1 Preheat oven to 350°F. Lightly butter a 9-inch springform pan and dust with flour. Or use a 9-inch round cake pan, butter and dust with flour and line the bottom with parchment paper.

2 Combine 1 cup of flour with baking powder and salt and set aside.

3 Using a mixer, beat the butter on medium high speed for 2 minutes. Then add the sugar and vanilla and beat until light and fluffy, a couple minutes more. Add the eggs one at a time and beat until well blended. Reduce the speed of the mixer to low and slowly add the flour mixture, beating until smooth. Pour the batter into the prepared baking pan.

4 Combine the berries with the remaining teaspoon of flour and the lemon juice in a bowl. Spoon the berry mixture over the batter.

5 Bake on middle rack in oven for 1 hour at 350°F, or until a toothpick inserted into the center comes out clean. Remove from oven and let the cake cool in the pan for 10 minutes. Carefully slide a thin knife around the edges of the cake to release it from the pan. Transfer the cake to a platter, berry side up. Dust the cake with powdered sugar before serving.

Monday, May 28, 2012

Tres Leches Cake Is Made With Three Layers: Cake, Filling, And Topping

The first time I've ever heard of Tres Leches cake is through the Internet and I've been curious about trying it ever since. Tres Leches is a popular cake in Latin American countries like Mexico, Nicaragua and Cuba.This cake is made with three layers: Cake, filling, and topping. There are 4 types of milk in the filling and topping (whole milk, condensed milk, evaporated milk, and heavy cream). This is an excellent cake for milk lovers!"
  
Tres Leches Cake
INGREDIENTS
  
Cake:
  
1 1/2 cups cake flour
  
1 1/2 tsp. baking powder
  
1/2 salt
  
1/2 cup unsalted butter
  
1 cup sugar
  
5 large eggs
  
1 1/2 tsp. vanilla extract
  
Milk Glaze:
  
1 (14-ounce) can sweetened condensed milk
  
1 (12-ounce) can evaporated milk
  
1 cup half and half cream
  
Topping:
  
1 1/2 cups whipping cream
  
1/4 cup powdered sugar
  
1 1/2 tsp. vanilla extract
  
Directions
  
For the cake:
  
Preheat the oven to 350 degrees F. Lightly oil and flour a 13 by 9-inch metal pan and set aside.
  
Whisk together the cake flour, baking powder and salt in a medium mixing bowl and set aside.
  
Place the butter into the bowl of a stand mixer. Using the paddle attachment, beat on medium speed until fluffy, approximately 1 minute. Decrease the speed to low and with the mixer still running, gradually add the sugar over 1 minute. Stop to scrape down the sides of the bowl, if necessary. Add the eggs, 1 at a time, and mix to thoroughly combine. Add the vanilla extract and mix to combine. Add the flour mixture to the batter in 3 batches and mix just until combined. Transfer the batter to the prepared pan and spread evenly. This will appear to be a very small amount of batter. Bake on the middle rack of the oven for 20 to 25 minutes or until the cake is lightly golden and reaches an internal temperature of 200 degrees F.
  
Remove the cake pan to a cooling rack and allow to cool for 30 minutes. Poke the top of the cake all over with a skewer or fork. Allow the cake to cool completely and then prepare the glaze.
  
For the glaze:
  
Whisk together the evaporated milk, sweetened condensed milk and the half-and-half in a 1-quart measuring cup. Once combined, pour the glaze over the cake. Refrigerate the cake overnight.
  
Topping:
  
Place the heavy cream, sugar and vanilla into the bowl of a stand mixer. Using the whisk attachment, whisk together on low until stiff peaks are formed. Change to medium speed and whisk until thick. Spread the topping over the cake and allow to chill in the refrigerator until ready to serve.

Tuesday, May 22, 2012

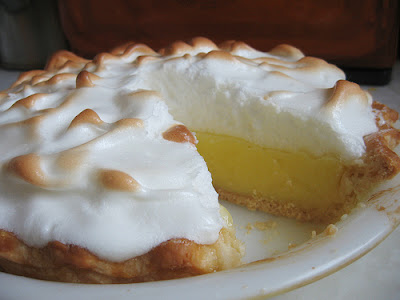
Lemon Meringue Pie Is Thickened With Cornstarch And Flour In Addition To Egg Yolks

Start by making the Lemon Meringue Pie: first sieve the flour and a pinch of salt into a large bowl, holding the sieve up high to give the flour a good airing. Then add the butter and lard, cut into smallish lumps, and, using only your fingertips, lightly rub the fat into the flour, again lifting the mixture up high all the time. When everything is crumbly, sprinkle in some cold water – about 1 tablespoon. Start to mix the pastry with a flat-bladed knife and then finish off with your hands, adding a few more drops of water until you have a smooth dough that will leave the bowl clean. Then pop the pastry into a plastic bag and let it rest in the refrigerator for 30 minutes.

Lemon Meringue Pie
Lemon Filling:
  1 cup sugar
  1/4 cup cornstarch
  1/8 teaspoon salt
  6 large egg yolks
  1 1/2 cups water
  1 tablespoon lemon zest
  1/2 cup lemon juice (fresh from 2 - 3 lemons)
  2 tablespoons unsalted butter
  
Merigue:
  3 egg whites
  1/2 tsp vanilla
  1/4 tsp cream of tartar
  6 tblsp sugar

In sauce pan, mix 1/2 cups sugar, cornstarch, flour, and salt. Gradually add hot water, stirring constantly. Cook and stir over high heat till mixture comes to boiling. Reduce heat; cook and stir 2 minutes longer. Remove from heat.
  
Stir small amount hot mixture into egg yolks, then return to hot mixture. Bring to boiling and cook 2 minutes, stirring constantly. Add butter and lemon peel. Slowly add lemon juice, mixing well. Pour into pastry shell. Spread meringue over filling; seal to edge. Bake at 350 degrees for 12 to 15 minutes. Cool before cutting.
  
Directions:
  
Preheat oven to 350 degrees F (175 degrees C).
  
To Make Lemon Filling: In a medium saucepan, whisk together 1 cup sugar, flour, cornstarch, and salt. Stir in water, lemon juice and lemon zest. Cook over medium-high heat, stirring frequently, until mixture comes to a boil. Stir in butter. Place egg yolks in a small bowl and gradually whisk in 1/2 cup of hot sugar mixture. Whisk egg yolk mixture back into remaining sugar mixture. Bring to a boil and continue to cook while stirring constantly until thick. Remove from heat. Pour filling into baked pastry shell.
  
To Make Meringue: In a large glass or metal bowl, whip egg whites until foamy. Add sugar gradually, and continue to whip until stiff peaks form. Spread meringue over pie, sealing the edges at the crust.
  
Bake in preheated oven for 10 minutes, or until meringue is golden brown.
  
Note: For creamier filling, cook and stir first five ingredients 8 minutes over low heat after mixture comes to boiling. Blend in egg yolks as above; cook 4 minutes after mixture boils.
  
Do not use plastic bowl, plastic holds oil and will cause the merigue to not be as stiff.
  
Beat egg whites with vanilla and cream of tartar till soft peaks form. Gradually add sugar, beating till stiff and glossy peaks form and all sugar is dissolved. Spread meringue over hot filling, sealing to edge of pastry. Bake at 350 degress for 12 to 15 minutes, or till meringue is golden. Cool.

Monday, May 14, 2012

Rich And Smooth Red Velvet Cake Has A Lot Of Fans

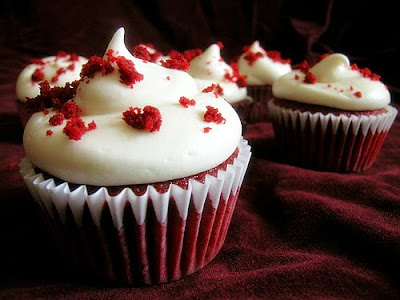
red velvet cake
Rich and smooth red velvet cake has a lot of fans. If you are baking this cake to make the Christmas tree cake for your holiday party, you will need two batches. Its deep red color makes it makes it a good fit for the red and green Christmas color theme, but this cake will elicit oohs and ahhs any time of year.
  
Red Velvet Cake Ingredients

Vegetable oil for the pans

1/2 cups all-purpose flour

1/2 cups sugar

1 teaspoon baking soda

1 teaspoon fine salt

1 teaspoon cocoa powder

1/2 cups vegetable oil

1 cup buttermilk, at room temperature

2 large eggs, at room temperature

2 tablespoons red food coloring (1 ounce)

1 teaspoon white distilled vinegar

1 teaspoon vanilla extract

Cream Cheese Frosting, recipe follows

Crushed pecans, for garnish

Directions

Preheat the oven to 350 degrees F. Lightly oil and flour 3 (9 by 1 1/2-inch round) cake pans. In a large bowl, sift together the flour, sugar, baking soda, salt, andcocoa powder. In another large bowl, whisk together the oil,buttermilk, eggs, food coloring, vinegar, and vanilla.

Using a standing mixer, mix the dry ingredients into the wet ingredients until just combined and a smooth batter is formed.
Divide the cake batter evenly among the prepared cake pans. Place the pans in the oven evenly spaced apart.

Bake, rotating the pans halfway through the cooking, until the cake pulls away from the side of the pans, and a toothpick inserted in the center of the cakes comes out clean, about 30 minutes.
Remove the cakes from the oven and run a knife around the edges to loosen them from the sides of the pans. One at a time, invert the cakes onto a plate and then re-invert them onto a cooling rack, rounded-sides up. Let cool completely.
  
Frost the cake. Place 1 layer, rounded-side down, in the middle of a rotating cake stand. Using a palette knife or offset spatula spread some of the cream cheese frosting over the top of the cake. (Spread enough frosting to make a 1/4 to 1/2-inch layer.) Carefully set another layer on top, rounded-side down, and repeat. Top with the remaining layer and cover the entire cake with the remaining frosting. Sprinkle the top with the pecans
  
Cream Cheese Frosting:
  
1 pound cream cheese, softened
  
4 cups sifted confectioners' sugar
  
2 sticks unsalted butter (1 cup), softened
  
1 teaspoon vanilla extract
  
In a standing mixer fitted with the paddle attachment, or with a hand-held electric mixer in a large bowl, mix the cream cheese, sugar, and butter on low speed until incorporated. Increase the speed to high, and mix until light and fluffy, about 5 minutes. (Occasionally turn the mixer off, and scrape the down the sides of the bowl with a rubber spatula.)
  
Reduce the speed of the mixer to low. Add the vanilla, raise the speed to high and mix briefly until fluffy (scrape down the bowl occasionally). Store in the refrigerator until somewhat stiff, before using. May be stored in the refrigerator for 3 days.

Wednesday, May 9, 2012

Old Fashioned Pound Cake Recipe Will Have You Reliving Those Childhood Days


Pound Cake
Pound cake received its name from the original cake recipe that used one pound each of butter, sugar, eggs, and flour. The perfect accompaniment to a cup of tea, this cake is rich and buttery, with a gorgeous golden brown crust. While some like to savor the taste of a slice of pound cake without any other thing influencing its taste, many enjoy it with whipped cream or ice cream.

Original Pound Cake
Ingredients
  • 1 cup heavy cream
  • 2 sticks/1 cup of unsalted butter, softened, plus some for buttering the pan
  • 2 tsp vanilla
  • 3 cups sifted cake flour (not self-rising; sift before measuring), plus some for dusting
  • 6 large eggs, at room temperature for about 30 minutes
  • ¾ tsp of salt
  • 3 cups of sugar
  • A 10" tube pan (4 ½'' deep) or a 10'' bundt pan (3 ¼ inches deep)
Preparation

Place the oven rack in the middle position. Grease the baking pan with butter and lightly scatter some flour over it, shaking off the excess. In a wide shallow dish, add the salt to the sifted flour (3 cups), and then sift the flour once again. You need to sift the flour three times. Cream the butter (2 sticks) and sugar in a large bowl, until you get a good amount of air into it. You get great results after about or 6 to 8 minutes of whirling with a handheld mixer, at medium-high speed.

Now gradually drop in the eggs, one at a time. After all the eggs are added, blend in the vanilla, and lower the speed of the mixer to low, before adding the flour. Follow this with all the cream, and finally the remaining flour. Ensure that you blend well, after each addition. Keep scraping all the batter that sticks to the side of the bowl and dumping it in the middle while mixing. Give the batter one final one minute whirl at medium-high speed.

Now pour the creamy, satiny batter into the prepared baking dish and gently bang the dish on the work surface once or twice, to get rid of air bubbles. Place the dish in the oven and turn on the heat to 350°F. Within about an hour or an hour and fifteen minutes, the cake should turn golden and a wooden pick or skewer pierced into the center of the cake should come out with a few crumbs stuck to it. However, if you keep checking it this way, you could take it out earlier if you feel that it is done. Allow the cake to cool in the pan on a rack for at least 30 minutes. Gently run a knife around the inner and outer edges of the cake, to separate it from the dish, and then invert the dish onto the rack. Your delectable pound cake is ready to eat!

This old-fashioned pound cake recipe is tried and tested, with rave reviews. A different way to enjoy this pound cake is to toast it. Better yet, turn it into a sinfully rich, grilled pound cake. Prepare the batter by beating an egg with two tablespoons each of milk and Grand Marnier. Now, just like you would do while preparing a French toast recipe, dip each slice of cake into this mixture, and brown each side on the grill. Serve it for dessert, along with fresh strawberries and whipped cream, and your guests will think they've died and gone to heaven!

Sunday, April 29, 2012

Basic Cake Recipe That You Can Try At Home


Basic Cake Recipe
With the advent of commercial cake mixes, people stopped making cake from scratch. However, these days, there seems to be a re-awakening and appreciation for baking desserts and cakes from scratch. Since the time I came across a basic cake recipe, I have not used pre-packaged, preservative-packed mixes, which were so popular for a long time. There are some tips I would like to give you before we actually turn towards cake recipes from scratch. The most important tip is to pay attention to the exact measurements. If you miss or make any mistake with the measurements, chances are high that the cake may not turn out to be the same way as you had expected it to be. The next important step is to follow the recipe to the T. Any changes in the process may end up making the cake similar to a brick. Sifting the flour before you use it in the batter will give the batter lightness. If you do not want to use shortening, then you can substitute it with either margarine, butter or applesauce. This will help in preserving moistness and richness, but remove some of the weight and bad fats from the cake. Now we will turn towards the recipes.

How to Make a Basic Cake from Scratch

Ingredients
  • All-Purpose Flour 1 cup
  • White Sugar ½ cup
  • Shortening ¼ cup
  • Milk ½ cup
  • Baking Powder 2 teaspoons
  • Salt ½ teaspoons
  • Vanilla Extract 1 teaspoon
  • Eggs 2
Method
  • Preheat the oven to 350 degrees and grease and flour the baking pan.
  • Mix together sifted all-purpose flour, baking powder and salt.
  • Sift the flour mixture and keep aside.
  • In a large bowl, mix sugar and shortening together. Whip till it is light and fluffy.
  • Add one egg at a time and beat thoroughly till the mixture is fluffy and light.
  • Add flour mixture alternately with milk and mix well, so that no lumps are formed. Make sure the batter is soft.
  • At last, stir in vanilla and mix well.
  • Transfer the batter into the baking pan.
  • Bake at 350 degrees Fahrenheit for 40 to 45 minutes. A toothpick inserted into the cake should come out clean.
Basic Cake with Plain Flour

Ingredients
  • Butter 2 sticks
  • Sugar 1 2/3 cups
  • Eggs 5
  • Plain Flour 2 cups
  • Vanilla 1 teaspoon
  • Lemon 1 teaspoon
Method
  • In a bowl mix together butter and sugar, till light and fluffy.
  • Add one egg and continue to whisk, so that the mixture is fluffy.
  • Gradually add plain flour to the egg and sugar mixture and keep whipping, so that the batter is soft.
  • At last add vanilla and lemon and mix well.
  • Grease and flour a baking pan and transfer the batter into the pan.
  • Place the baking pan in a preheated oven and bake at 325 degrees for 45 minutes.
  • When the cake leaves the side of the pan, understand the cake is ready and remove it from the oven.
Basic Cake without Eggs

Ingredients
  • Flour 1½ cups
  • Sugar ¾ cup
  • Baking Powder 2 teaspoon
  • Salt ¼ teaspoon
  • Milk (Soy Milk) ¾ cup
  • Vanilla 2 teaspoons
  • Egg Substitute for 1 egg
Method
  • Grease and flour the baking pan and preheat the oven to 350 degrees Fahrenheit.
  • In a bowl sift flour, sugar, baking powder and salt together.
  • Add the remaining ingredients and beat till the batter is soft without any lumps.
  • Pour the batter in the baking pan and bake the cake for 30 minutes, till a toothpick inserted in the center of the cake comes out clean.
These were just the basic cake recipes. You can add other ingredients like cocoa, fruit chops, nuts, etc. to change the flavor of the cake. I hope you do enjoy baking as much as I do, and till next time happy baking!

Wednesday, April 25, 2012

Cream Cheese Pound Cakes Just Melt In The Mouth


Cream Cheese Pound Cakes
Cream cheese lend a pound cake a rich creamy feeling and the butter just makes the cake melt in the mouth. The richly cream-laded cake is generally moist (unless the proportion is messed up) with a dark golden-brown sweet and crispy crust all around it. Lemon or orange zest is usually added to add that extra citrusy flavor to it. Fresh fruits are to be avoided but feel free to add chocolate chips, dried fruits and nuts. Well what are you waiting for? Heat up the oven and bake any cake mentioned below.

Basic Cream Cheese Pound Cake

Ingredients:
  • All-purpose flour, 3 cups
  • Unsalted butter, 1½ cups
  • Cream cheese, 1.8 ounces
  • Castor sugar, 3 cups
  • Large eggs, 6
  • Baking powder, 1 tsp
  • Baking soda, ½ tsp
  • Salt, ½ tsp
  • Vanilla extract, 1 tbsp
In a large glass bowl, sift together the all-purpose flour, baking powder, baking soda and salt. Using an electric beater, beat unsalted butter and cream cheese until smooth and well-blended. Add castor sugar in three parts and beat well after each addition, until it is light and fluffy. Add one egg at a time and beat continuously. Lastly add the vanilla extract and beat for a couple of seconds more. Stir in sifted flour, and beat until well-blended. Pour cake batter into a greased pan, and bake in preheated oven at 350º F. Insert a toothpick to check if the baking is complete. Remove from the oven and let it cool down completely, before removing cake from the pan.

Strawberry Cream Cheese Pound Cake

Ingredients:
  • Flour, 3 cups
  • Cream cheese, 3 ounces
  • Butter, 1 cup
  • Shortening, ½ cup
  • Eggs, 5
  • Buttermilk, 1 cup
  • Vanilla extract, 1 tsp
  • Lemon extract, 1 tsp
  • Baking powder, 1 tsp
  • Salt, ½ tsp
  • Prepared strawberry topping
  • Fresh strawberry, ½ cup
In a large bowl, cream butter, cream cheese and shortening, until smooth. Gradually add sugar and beat it until it becomes light and fluffy. Add eggs and beat after each addition, until all eggs have been added. Sift flour, baking powder and salt in a bowl. Add it alternately with buttermilk, to the creamed mixture, beating until blended. Add to it, the vanilla and lemon extract. Stir in the fresh strawberries gently with a spoon. Pour batter into a greased cake pan and bake in a preheated oven at 350º F. Insert a toothpick in it to check if it comes out without sticking. Once the cake has completely cooled off, gently shake it off from the pan. Spread strawberry toppings over the top and serve.

Blueberry Cream Cheese Pound Cake

Ingredients:
  • All-purpose flour, 1½ cup
  • Blueberries, 1 cup
  • Cream cheese, 3 ounces
  • Unsalted butter, 4 ounces
  • Sugar, 1½ cup
  • Large eggs, 4
  • Baking powder, ½ tsp
  • Vanilla extract, 1 tsp
  • Grated lemon zest, 1 tsp
Sift flour, baking powder and salt together in a mixing bowl. Beat butter and cream cheese using a beater. Add sugar to it and beat until fluffy. Continue beating in one egg at a time. Add the shifted flour, vanilla extract and lemon zest, and beat until all ingredients have blended well. With a spoon, gently fold in the blueberries, and pour the cake consistency in a greased pan. Bake until the inserted toothpick comes out clean. Cool the cake before serving.

Above recipes are easy to make and need little time to prepare. For all those who are hard-pressed for time, it is easy to incorporate ready-made cake mixes, and achieve the same creamy rich moist cakes. Cream cheese is used to make some yummy desserts and pie recipes also!

Wednesday, April 18, 2012

Do You Wanna To Have Desserts With Little Fat

Healthy Desserts
Desserts are the symbol of high-calorie and high-fat meals. But have you ever thought about how healthy they can be, which ones are quite healthy and how you could make the others healthier? Everything that contains lots of fruit, little fat (like cream or mascarpone) and sugar is already healthy.

There are a lot of American desserts that are very popular worldwide. Great examples are the classic  cheesecake. These American desserts are made from cream cheese and these are added with sugar as well as vanilla essence, sour cream and lemon juice. The mixed cream is then added onto a cracker crust, and then properly chilled before they are served. American cheesecakes should not be over beaten as they could destroy the proper consistency of the cream cheese itself. Over the years, these well-loved American cheesecakes have been modified a number of times, creating more and more variations to further satisfy the needs of the dessert lovers worldwide.

Today there is a tendency to make healthy desserts with artificial sweeteners and little or no fat. This gives people who can not desserts have an option to get the taste without the harmful effects of sugar in their system. People with diabetes are an excellent example. Some non-fat desserts are good, but they can not beat the taste of regular desserts. The taste of sugar and fat can not be duplicated in desserts. But people have created new types of desserts that taste almost as good.

We have seen the transformation based desserts complex in a matter of a few centuries and we have the sugar industry to thank for that. If we had no sugar for commercial use in a form, then we would not be able to make desserts in the shape of their prolific today. The desserts are now regarded as normal and common, but in a time not too distant past, it did not exist in the forms that we have now.

Friday, April 13, 2012

Try Making Poppy Seed Cake Recipes And Enjoy The Delicious Taste Of This Desser

Poppy seeds make wonderful ingredients for many recipes. Not only do not they add taste to the recipe, but also benefit you with a number of health benefits. These kidney shaped seeds are actually harvested from opium poppy (Papaver somniferum) and they are high in various useful vitamins and minerals. Poppy seeds are extensively used for baking cakes, cupcakes, chicken salads, etc. So, do you want to learn a recipe to make poppy seed cake from scratch? Here are some recipes to make poppy seed cake in various flavors.

Poppy Seed Cake Recipes from Scratch

Orange-Pumpkin Poppy Seed Cake Recipe

Ingredients
  • Poppy seeds - 2 tablespoons
  • Pure pumpkin - 1 (15 ounce) can
  • Orange cake mix - 1 (18.25 ounce) package
  • Eggs - 3
  • Orange juice - 2/3 cup
Procedure

First preheat the oven to 350 degree Fahrenheit. Take a 9 inch cake pan and grease it with cooking spray. Then, in a medium-sized mixing bowl, combine cake mix, orange juice and eggs. Beat the mixture properly with help of an electric mixer on low speed. Beat until the mixture moistens completely. Now, increase the speed to medium and combine pumpkin to the mixture. Then, add the poppy seeds and finally pour the cake batter into the greased pan. Divide the batter properly and bake it in the preheated even. Bake the cake for 28 to 30 minutes and then leave it to cool on wire racks.

Cream Cheese Poppy Seed Cupcakes Recipe

Ingredients
  • Softened butter - 5 tablespoons
  • Flour - ½ cup
  • Salt - 1/8 teaspoon
  • Powdered unrefined cane sugar - ½ cup and one teaspoon (for dusting)
  • Large egg-1
  • Egg yolk - 1
  • Vanilla extract - ½ teaspoon
  • Cream cheese (room temperature) - ¼ cup
  • Poppy seeds - 1 teaspoon, ½ teaspoon
Procedure

To prepare this poppy seed cake recipe from scratch, first preheat the oven to 325 degree Fahrenheit. This recipe yields 4 cupcakes, so, place the cupcake papers into 4 ramekins or 4 muffin tins. Take a medium-sized mixing bowl and combine flour and salt. Then combine butter with help of electric mixer. Add ½ cup powdered sugar and continue creaming the mixture with electric mixer. Blend the mixture until it becomes soft and fluffy. Then, add egg, egg yolk and vanilla one by one. Lower the speed of the mixer and combine poppy seeds to the flour mixture. Your cupcake batter is ready, spoon this into the cupcake cups and divide the batter evenly into all the cupcake cups. In a small bowl combine 1 teaspoon of powdered sugar and cream cheese. Blend them properly to attain a smooth texture. Then, spoon this cream mixture over each cupcake and then sprinkle poppy seeds. Bake the cupcakes for 25 minutes and cool them for 5 minutes after baking. Dust powdered sugar over them while serving.

Almond Poppy Seed Cake Recipe

Ingredients
  • Sugar -1¼ cups
  • White shortening - ½ cup
  • Eggs - 2 large
  • All-purpose flour - 2 cups
  • Baking soda - 1 teaspoon
  • Salt - ¼ teaspoon
  • Buttermilk - 1 cup
  • Almond extract - 2-3 teaspoons
  • Vanilla - ½ teaspoon
  • Poppy seed - 1/3 cup
  • Sliced almonds - ½ - ¾ cup
  • Butter (softened) - ½ cup
  • Cream cheese (softened) - 1 (8 ounce) package
  • Vanilla - 2 teaspoons
  • Whipped cream - 2 tablespoons
  • Confectioners' sugar - 3½ cups
  • Frozen whipped topping (thawed) - 1 cup
Procedure

This recipe makes almond poppy seed cake with fluffy cream cheese frosting. Preheat the oven to 350 degree Fahrenheit and then grease a 9 by 13 inches baking pan. Take a large mixing bowl and combine shortening and sugar. Beat the mixture for about 2 minutes and then add eggs, almond extract and vanilla extract. Beat the mixture properly at high speed. In another bowl, combine flour, baking soda and salt. Add this mixture to the mixture in large bowl along with buttermilk. Combine the ingredients until they are just mixed and then add poppy seeds. Bake the batter for 30 to 35 minutes in preheated oven. To prepare the cream frosting, combine butter, vanilla, whipping cream and cream cheese in a medium-sized bowl. Beat the mixture to attain light and fluffy texture. Add in confectioners' sugar and again beat the mixture. Then add the whipped topping and blend the mixture completely. Spread this topping over the baked cake and garnish with chopped almonds.

Lemon Poppy Seed Muffin

Ingredients
  • All-purpose flour - 2 cups
  • White sugar - 3/4 cup
  • Poppy seeds - ¼ cup
  • Baking powder - 2 teaspoons
  • Baking soda - 1 teaspoon
  • Salt - ½ teaspoon
  • Eggs - 2
  • Lemon flavored yogurt - 1 cup
  • Vegetable oil - ¼ cup
  • Grated lemon zest - 1 tablespoon
  • Lemon juice - 1/3 cup
  • White sugar -3 tablespoons
Procedure

Preheat the oven to 400 degree Fahrenheit and then grease a muffin tin with cooking spray. Take a large mixing bowl and add flour, poppy seeds, baking powder, baking soda, salt and ¾ cup white sugar. Combine the ingredients properly. In another bowl, combine eggs, yogurt vegetable oil and lemon zest. Blend the mixture properly and mix it with flour mixture. Mix the mixtures until just combined and see that you do not over-mix. Now, spoon this batter evenly between the muffin cups and bake the muffins in the preheated oven for 20 minutes. In small bowl combine lemon juice, 3 tablespoons of white sugar and stir to dissolve sugar completely. When the muffins are baked, pierce their tops with toothpick several times. Then, gently pour one tablespoon of lemon juice over each muffin. Let the lemon poppy seed muffins cool in the baking pan for 10 minutes. You can prepare poppy seed cake with lemon filling in similar manner.

Monday, April 2, 2012

Tips For Making Natural Yellow Cake Recipe

One of the most popular easy-to-make convenience foods in America are cake mixes. The first cake mix took a decade to be developed. The yellow cake mix, the first of its kind, was followed by flavors like white, marble and chocolate malt and then spice cake mix. The only difference between the yellow and white cake mixes, apart from the type of flour, was that latter was also called plain and used only powdered egg white; while the former used powdered egg yolk (that's why the yellow color).

As the years went by, people preferred using fresh ingredients, in order to get a more authentic and natural taste of cake. Powdered eggs were removed from the cake mix and directions on the carton suggested the use of two fresh eggs instead. Over the years, many flavors were added, but the love for yellow cake mix still lingers on.

Rich taste and extra-moist qualities, and exquisite flavor, apart from easy cooking and nutrition value, is what makes a convenience cake. Let's take a look at some easy-to-make yellow cake mix recipes.

Natural Yellow Cake Recipe

Ingredients

natural yellow cake mix, 16- to 18-ounce (1 pkt)
all-purpose flour, 1 cup
whole wheat pastry flour, 1 cup
evaporated cane juice sugar, 1½ cups
baking powder, 4 tsps
eggs, 2
salt, 1 tsp
salted butter, softened, ½ cup and 2 tbsps
low-fat 2% milk, 1 cup
vanilla extract, 1 tsp

Preparation

For the Cake Mix
Pour the flours into food processor bowl. Add sugar, baking powder and salt and blend. Be careful not to over beat. You can also hand mix with a wire whisk. Make 4 to 5 chunks of butter and add to the flour mixture and beat, until it is merged wholly. Use the cake mix immediately.

For the Yellow Cake
Preheat oven to 350 degrees F. Butter and flour a 9x13-inch cake pan or two 8-inch round cake pans; set aside. Take a large mixing bowl and transfer the cake mix into it. Add eggs, milk and vanilla and beat the contents with an electric mixer, gradually increasing the speed from slow for 1 minute, to medium high for 2 minutes. Scrape the edges of the bowl intermittently. Move the batter to the prepared baking pans.

In case of 9x13 inch cake, bake for 40-50 minutes or until done (test with a toothpick, if cake is ready). For the 8-inch cakes, baking time can be lessened to 25-35 minutes.

Set the cake aside for 10 minutes for cooling, then remove from the pans. You can frost the cake, if you wish. Frosting improves a cake's appearance and also keeps it moist.

Traditional Yellow Cake Mix Recipe

This recipe can also be used to make cupcakes. To bake cupcakes, you will require muffin tins.

Ingredients

yellow cake mix, 1 box (18 ounce)
large eggs, 3
orange puree or white bean puree, ½ cup
applesauce, ½ cup
water, 1 cup
oat bran, ½ cup

Preparation

Preheat the oven to 350 degrees F. Spray a cake pan or muffin tins (for cupcakes) with flour. Mix all ingredients in the bowl of the electric mixer and blend for 30 seconds on less speed. Blend again at medium speed for 2 minutes. Pour the batter into the cake pan or muffin tins. Bake cake for up to 35 minutes or cupcakes for 18 minutes. Insert toothpick in center of cake or cupcake; check if it comes out clean.

You don't have to bake a cake, only when you are throwing an impromptu birthday party. The cake or cupcakes can be easily stored in airtight containers. But before you store, make sure you cool the cake on a wire rack. If you refrigerate it, make sure you thaw at room temperature for 2-3 hours before serving. The best way to store at room temperature is placing the cake under a large inverted bowl. In case of desserts, refrigeration is the best way to keep the flavor right!

Tuesday, March 27, 2012

A Variety Of Carrot Cake Recipes To Suit Every Taste Bud

It doesn't have to be difficult to make a delicious homemade carrot cake recipe, and I'll show you exactly how with this tasty recipe right here! Out of all the carrot cake recipes I have tried, this homemade carrot cake recipe is one of the easiest and also one of the most delicious. Your kids will surely love and enjoy this yummy sweet and healthy treats.
When I was growing up I remember my mother telling me to eat carrots because they were good for my eyes, since she knew that I detested eating carrots in its plain form, she began experimenting with them. It is only because of the effort that she put into each recipe that today I relish carrots. Here are some carrot cake recipes that might help instill the same love for carrots in your children.

Vegan Carrot Cake

Required Ingredients
  • 2 cups of grated carrots
  • 1½ cup of raisins
  • 2 cups of water
  • 1½ teaspoons of cinnamon
  • 1½ teaspoons of allspice
  • ½ a teaspoon of cloves
  • 1 a cup of sugar
  • ½ a teaspoon of salt
  • 3 cups of flour
  • 1 cup of soymilk
Instructions
  • First preheat the oven to 350 °F.
  • Gently simmer the carrots, raisins, water and spices in a medium-sized saucepan for 8 to 10 minutes.
  • Then add the sugar and salt and cook for more than 2 minutes.
  • Once that is done, remove from heat and cool completely.
  • Now take a large bowl and combine the baking soda and flour in it.
  • Add the carrot mixture and the soymilk and combine nicely.
  • Grease a 9*9 inch baking pan and then pour in the batter.
  • Bake this mixture for an hour.
  • Your carrot cake is ready if the toothpick comes out clean.
Low Fat Carrot Cake

Required Ingredients
  • 6 white eggs
  • 1⅓ cups of white sugar
  • 1 cup of applesauce
  • ½ a cup of skim milk
  • 1½ teaspoon of vanilla extracts
  • ¼ a teaspoon of ground cloves
  • ½ a teaspoon of ground nutmeg
  • 1 teaspoon of ground cinnamon
  • 2 teaspoons of baking soda
  • 1 cup of whole-wheat flour
  • 1 cup of all-purpose flour
  • 1 can of crushed pineapple with juice
  • 2 cups of shredded carrots
  • ½ a cup of chopped walnuts
  • ½ a cup of raisins
Instructions
  • First take a large bowl and beat the egg whites in it.
  • Slowly beat in the applesauce, skim milk, sugar and vanilla.
  • Then stir in the dry ingredients in this order. First put in the cloves, nutmeg, cinnamon, baking soda and flour.
  • Now stir in one ingredient at a time, beginning with the pineapple (with the juice), carrots, walnuts and raisins.
  • Pour this mixture lightly into a lightly greased 9*13 pan.
  • Bake this in a preheated 350°F oven for 35 to 40 minutes.
Wheatless Carrot Cake

Required Ingredients
  • 5 eggs
  • 1 cup of sugar
  • 1 lemon
  • ⅓ cup of marsala or white wine
  • 2 cups of grated carrots
  • 1 cup of groundnuts
  • ½ a cup of cornmeal (preferably not coarse ground)
  • ½ a teaspoon of baking powder
  • ½ a teaspoon of cinnamon
  • A pinch of salt
  • 1 cup of sugar
  • ½ a cup of lemon or orange juice
Instructions
  • Preheat the oven to 350°F.
  • Now separate the eggs, remove the lemon rind and chop, grate the carrots and also grind the nuts.
  • With that done, beat the egg yolks and sugar until it is thick and light colored. Measure enough lemon juice, marsala and wine to make ½ a cup. Add this and the chopped rind to the yolk mixture and mix this well.
  • To the yolk mixture also add carrots and groundnuts.
  • Take a separate bowl and mix cornmeal, baking powder, cinnamon and salt and stir this into the yolk mixture.
  • In a large bowl beat egg whites to firm peaks. Now gently fold the yolk mixture, ⅓ at a time, into the whites taking care not to deflate the whites.
  • Once all that is done, pour the mixture into the prepared van and bake it until a cake tester or table knife stuck into the center comes out clean.

Sunday, March 18, 2012

Strawberry Cake Is One Of The Most Exotic Ways To Delight The Taste Buds

A strawberry cake is among the most enchantingly tasting cakes. It’s a cream filled cake that actually tastes so great. Milk is incorporated in the elements which makes it creamier. Sugar and egg can also be put into its elements to really make it nicer. Its bread consists of chiffon cake – an even and creamy cake full of strawberry fruits. This strawberry is even caramelized and placed like a filling from the cake. The icing and also the toppings comprise strawberry. It is simply usual to locate ground strawberry fruits combined with cream and offered because the icing. The fruit can also be the main one giving the attractive color pink towards the cake.

With the season of strawberries around, strawberry cake filling is one of the most exotic ways to delight the taste buds! Are you wondering what strawberry cake filling is? Well, imagine a normal cake filled with yummy strawberries and strawberry sauce, that's what is called strawberry cake filling! Any cake can be added with strawberry filling, but the taste of strawberry will be brought out if you add the strawberry filling to non-flavored cakes like simple yellow cake recipes or white cakes, etc. It is entirely your wish, if you like to eat chocolates and strawberries together, then you can try any of the following strawberry cake filling recipe with chocolate cake also! Now let's learn to make strawberry cake filling, from the following recipes.

Recipe #1
Ingredients
  • 2 cups hulled strawberries, crushed
  • 3 tbsp boiling water
  • ½ cup sugar
  • 2 tbsp cold water
  • 1 tbsp unflavored gelatin
  • ½ cup whipping cream
Process

Add sugar to the hulled strawberries and set them aside. In cold water soften the gelatin and once it is softened, add boiling water and stir until the gelatin dissolves. Add the dissolved gelatin mixture to strawberries and let cool. Now whip the cream, until its stiff. When the strawberry mixture is of syrup thickness, add the whipped cream to it. Refrigerate until it sets.

Recipe #2
Ingredients
  • 1½ tsp fresh lemon juice
  • 2 pints ripe strawberries, hulled, sliced in ½ if large
  • ½ tsp vanilla extract
  • 2 tbsp honey
  • 2 tbsp maple syrup
Process

Make a puree of half of the strawberries in a food processor. While blending, add honey, lemon juice, maple and vanilla; until it forms a smooth sauce. Now add the remaining strawberries and crush until chopped, do not make it a liquid.

Recipe #3
Ingredients
  • 1 lg. angel food cake
  • 1 tsp almond flavoring
  • 1 (8 oz.) container whipped cream
  • 1 can milk
  • ⅓ c. lemon juice
  • 1 (10 oz.) pkg. frozen strawberries, thawed and undrained
Process

First cut 1 inch slice of the angel food cake. Reserve it. Make a tunnel, by scooping out the center. Leave 1 inch at the bottom of the cake. The center cake which you had removed, cut that into pieces. Except strawberries, mix all the other ingredients and reserve 1½ cup. Add the cake pieces to the whip mixture and fold in strawberries. Now fill the tunnel with cake and whip mixture. Replace the top layer which you had removed. Cover the cake with reserved whip mixture. Refrigerate for chilling. When chilled, decorate with fresh sliced strawberries and almond slices (if wanted).

Recipe #4
Ingredients
  • ¾ cup sugar
  • 1 cup water
  • 3 tbsp cornstarch
  • 2 ½ - 3 cups strawberries (fresh or frozen, if using frozen thaw and drain)
Process

Take a large sauce pan and mix all the ingredients. Cook until the mixture thickens, over medium heat. Let it cool completely. This was one of the easy strawberry cake filling recipes. You can make it whenever you want, and that too in just a couple of minutes!

These were some of the easiest strawberry cake filling recipes. If you want, you can also add any of your favorite flavors to it, but make sure that the yummy taste of strawberry is not lost.

Friday, March 9, 2012

Birthday Cake To The Person's Heart


Birthdays are incomplete without cakes and to make the cake appealing to one's eye, it has to be designed in a way where it catches everyone's attention. Cake designs have always been a part of constant change thus leading to a lot of variations but at the end of the day, the design should be closest to the person's heart for whom it is being made for. There are endless possibilities but the cake has to be designed with the age and preferences of the person in mind.

If the birthday boy or girl is a sports freak, then the design can be of a cricket bat, a football or rugby ball or in fact a stadium. For your kid's birthday cake you can get your baker to design a cake that resembles the child's favorite cartoon character or sports star. Irrespective of the gender of your child, you can get the cake in the shape of a mermaid, airplane, ship, pirate or colorful clown. If it's a girl then you can design the cake with a real doll on the cake, to be precise a Barbie. Gadgets like computers or laptops or I-pods can also be interesting for young adolescents. If your kid likes to read, you can also order for a cake that looks like a book, specifically a Harry Potter one.

Kids would also love animal cakes like an alligator cake or an elephant cake, butterfly, cat or a dog cake. Car, bulldozer, police cars, bikes would also be a good idea for cakes. Even train or tractor cake would be innovative. A superman insignia or spaceship designed cake can also be a favorite with kids. For kids birthday cakes you can also try making a fish as a design, it can be a flounder or school of fish. Cakes can also be designed in the shape of burgers or hotdogs, candies, fruits and even drinks. There are various things that you can think of and gift your loved ones.

Birthday Cake Designs for Adults:
When it comes to adults the design does not matter much, the flavor is more important. Another characteristic of cakes ordered for adults is that they have alcohol as an ingredient, mostly rum. Still in the case of women, they would certainly like floral designs and men would definitely like something based on sports. In case of adults, naughty birthday cake designs can also be considered like a playboy bunny or the TV remote that he loves the most or his car keys that he always forgets. Similarly in the case of women it can be her stilettos or her purse that can be used humorously.

Birthday Cake Photos:
There are various sites on the Internet that help you to get a fairly good idea of how the design would look after you have made it or bought it as a cake since you can view clip arts which show you the colors and the designs quite vividly. It's always better to view those clip arts and get a printout of it so that you can show it to your baker and he can understand your concept better if there's something new that you are trying to do. Or else you can try the designs for birthday cakes given in this article.

If you really want to add some zing to the birthday that's approaching, you can either prepare a birthday cake yourself or order for one but do remember if you are ordering one, confirm with them a week in advance since all the good bakeries remain fairly busy and might just lose your order. Therefore to be on the safer side it is better to recheck and if you are making it yourself make a dummy cake before the final one, to correct any flaws it may have.

Thursday, March 1, 2012

Tips To Make Pool Party Cake Easier

The coolest part of the party was the cake, modeled after the above-ground pool in their backyard in New Hampshire. Make this cake and we guarantee your guests won't hesitate to plunge right in.

Ingredients
        1/2 gallon quality ice cream (any flavor)
        1 1/3 8.5-oz. pkgs. fudge sticks (chocolate or peanut butter)
        2 cups heavy cream
        1/4 cup sugar
        1/2 tsp. vanilla extract
        Blue food coloring
        Gummy rings
        Gobstoppers
        Paper umbrellas
        Plastic figures
        Licorice
        Decorators' frosting

Instructions
Step 1 Begin by making the ice-cream base of the pool cake. Let the ice cream soften at room temperature for 15 to 20 minutes, then ask your kids to help you spoon it into an 8-inch round springform pan, souffle dish, or plastic container. Pack the ice cream into the mold and smooth out the top. Cover with plastic wrap and freeze for at least 4 hours or overnight.

Step 2 After the ice cream has frozen solid, unmold it by dipping the container quickly into a pan of hot water; if necessary, you can also loosen the edges of the ice cream with a knife. Invert the mold onto a large plate and carefully lift off the pan to reveal the ice-cream cake.

Step 3 Your kids can then carefully place the fudge sticks (we alternated plain and chocolate-peanut butter) along the sides of the ice-cream pool cake, the cookies will resemble the panels of an aboveground pool. Return the cake to the freezer while you prepare the whipped cream.

To make the blue whipped cream waves, pour the cold heavy cream into a bowl. Beat with an electric mixer until the cream begins to thicken and soft peaks form. Add the sugar and vanilla extract and beat until stiff. Mix in several drops of blue food coloring. Frost the top of the frozen cake with the blue whipped cream, then return it to the freezer for 15 to 30 minutes or until set.

Next, let your kids turn the cake into a bustling pool with gummy ring inner tubes, Gobstopper beach balls, paper umbrellas, and plastic swimmers. Add a licorice ladder with licorice rungs (use decorators' frosting to glue it together).

Now it's time to take the plunge into the pool cake. For best results, serve it immediately and do not let it stand at room temperature for long. Store leftovers in the freezer. Feeds 10 to 12 hungry swimmers.

Tips:

To add variety, you can layer different flavors of ice cream or mix in candies (chocolate fish, anyone?). The trick is to loosen the ice cream without melting it, so don't hold the mold in the hot water for more than a few seconds. Ask your children to work quickly while they place the chocolate cookies around the outside -- otherwise, they'll have a melted "pool" of ice cream. For foolproof whipped cream, chill the bowl and beaters in advance. Take the kids with you to buy pool accessories at a party supply store, suggests Gail. "They have a better concept than we do about what makes good pool toys." 

Saturday, February 25, 2012

Delicious Pudding Cake Mix Recipes

Cakes are a weakness for people who have a sweet tooth. Be it a birthday, wedding or an anniversary, people love to have cakes and pastries as their dessert. Baking a cake is an art, at which some people are experts. But, people who are apprentices at cooking, can have a difficult time while baking one. Baking a cake is a long procedure and needs a lot of time and patience, as one wrong measure can ruin the cake. However, now one can make use of the ready-made cake mix packets (flour, sugar, baking powder and flavoring), that are readily available in grocery stores. Cake mixes were introduced in 1947-48, by General Mills and Pilsbury, and since then, many companies have come out with their own cake-mixes. Combining pudding with the cake mix has also become common among many people.

Lemon Pudding Fruit and Nut Cake

Ingredients
  • 3¾ ounces lemon pudding mix, instant
  • ¼ cup apricot brandy
  • 1 package spice cake mix
  • 4 large eggs
  • 2/3 cup apricot nectar
  • 8 ounces sifted powdered sugar
  • ½ cup vegetable oil
  • 4 ounces candied pineapple
  • 2-3 tablespoons apricot brandy
  • 4 ounces candied cherries
  • 8 ounces walnuts
  • 8 ounces dates
Preparation
  1. Preheat the oven at 350° F. Chop the pineapple, cherries, walnuts and dates and keep them ready.
  2. In a small bowl, break the eggs one by one, stir well and set aside.
  3. Take cake mix in a large mixing bowl, and add ¼ cup apricot brandy, pudding mixture, apricot nectar and vegetable oil. Pour the eggs into the mixing bowl for at least 2 minutes, till it becomes smooth. Sprinkle chopped nuts and stir again.
  4. Grease a 10 inch baking pan, and spread the batter in it evenly. Keep it in the oven and let it bake for 55 minutes. Before taking it out, check whether the cake is completely baked.
  5. Let it cool for 10-15 minutes. In a small bowl, take 1 cup sugar and add apricot brandy to it. Mix well and pour over the cake. Your fruit and nut cake is ready to be eaten.
Choco-Chip Pudding Cake

Ingredients
  • 8 ounces chocolate chips
  • 2 eggs
  • 1 packet chocolate pudding mix
  • 2 cups milk
  • 1 packet chocolate pudding mix, instant
  • 4 ounces nuts, chopped
Preparation
  1. Cook pudding with 2 cups of milk, as instructed in the packet cover and keep aside for cooling.
  2. In a large mixing bowl, empty the contents of the cake mix and combine it with the eggs. Beat it to make a soft and fluffy batter. Pour in the pudding and stir till it blends completely.
  3. Grease a 9x13 sized baking pan and spread the cake batter into it. Drop in chocolate chips and nuts and bake in a preheated oven at 350° F, for not more than 30-35 minutes.
Banana Pudding Yellow Cake

Ingredients
  • ¾ cup mashed banana
  • 1 package banana flavored pudding, instant
  • 4 eggs
  • 1 cup water
  • 1 packet yellow cake mix
  • 1 dash vanilla extract
  • ¼ cup vegetable oil
For Glazing:
  • 16 ounces confectioners' sugar
  • 2 tablespoons milk
  • 4 ounces chopped walnuts
  • white icing
Preparation
  1. Take a large bowl, and mix the pudding and cake mix. Make a hole in the middle of the batter and put in eggs, water, mashed bananas and oil. Stir till all the ingredients are mixed well.
  2. Transfer the batter into a 10 inch greased baking pan and bake it in a preheated oven for 50-55 minutes at 350° F.
  3. Take it out of the oven and keep aside for cooling.
  4. In a small bowl, take sugar and mix it with milk. Pour over the cake and top it with white icing. Decorate it with chopped nuts and your banana pudding yellow cake is ready.
Baking a cake has surely become a simple task with the use of cake mix. Try these pudding cake mix recipes and come out with cakes as delicious as homemade cakes, made in the traditional way.

Wednesday, February 22, 2012

Flower Birthday Cake Ideas

Nobody likes to have a plain birthday cake no matter how great it tastes. A birthday cake should not only taste delicious, but should also be great to look at. A well decorated birthday cake is what every birthday girl or boy looks forward to. A very popular design in birthday cakes is the flower birthday cake. There are two ways in which you can make a flower birthday cake. One is to make a simple sponge cake or chocolate cake and then decorate it with flowers made with different types of icing.

The other is to shape the cake like a flower and then cover it with plain butter icing or royal icing. The first method of decorating a regular cake with flowers made with icing is a simpler method to master. Before you try to mold flowers with icing for your flower cake, there are a few things that you need to keep in mind. You need to choose the right icing with the right consistency for making the icing flowers. The icing needs to be a bit stiff, so that it can hold the shape of the petals of flowers. If the icing is not of the right consistency, the flowers will simply not hold their shape and it will ruin the birthday cake. Here we are going to discuss how to make a flower birthday cake.

Some of the best icing for making a flower birthday cake is buttercream icing and royal icing. You can also make fondant flowers by using fondant for decorating a flower birthday cake. Whichever type of icing you choose, make sure that it is of the right consistency. If you notice that the icing is not holding the shape of the flowers, then the icing is probably not stiff enough and you need to add a bit of icing sugar to it. On the other hand, if you notice cracks on the flowers, then the icing is probably too stiff and you need to add a bit of liquid. Given below are a few ideas on how to make flower birthday cake decorations.

How to Make a Carnation Icing Flower
To make a carnation flower with icing you need royal icing of a stiff consistency and a disposable piping bag. Place a wax paper on your work table and pour the royal icing inside the piping bag. Attach a number 12 round decorating tip to the decorating bag and then pipe a small dot or ball on the waxing paper. Hold the piping bag at a ninety degree angle to the cake and pipe some stiff petals in the center of ball by using a wiggling up and down motion. Finish by piping some ruffled petals along the edge of the circle. Your carnation icing flower is ready and you can use it to adorn the birthday cake. Make several carnation icing flowers in different colors and place them on top of the birthday cake for a beautiful flower birthday cake.

How to Make Drop Flowers
Piping drop flowers is one of the easiest icing flowers techniques to master. To make drop flowers, you will need a piping bag and stiff buttercream icing. Hold the piping bag so that it is at a ninety degree angle to the cake. Now squeeze the top portion of the piping bag, with gentle pressure and pipe a bit of icing on the cake. When you have the desire drop flower size, lift the tip of the piping bag in one smooth motion. Attach a writing tip to the piping bag and pipe a small dot at the center of the drop flower. Use different colored buttercream icing to make small and medium-sized drop flowers to decorate the birthday cake.

How to Make a Rose Icing Flower
To make a rose icing flower you need frosting in pink color, a piping bag, rose tip, wax paper and a rose nail. Pipe a small amount of frosting on the rose nail and then place the wax paper over it. This will ensure that the wax paper does not move when you start the icing process. Hold the piping bag over the rose tip at a ninety degree angle and then using medium pressure, squeeze out a bit of frosting on the center of the waxing paper. Now rotate the rose pin as you steadily squeeze out icing in a swirling pattern. Squeeze the piping bag in an arc while rotating the rose pin in the other direction. Make three swirls in this way to make a small rose. The arcs should overlap each other so that they look like petals. Once this is done, make five more swirls over the first ones, making sure that the edges are angled inwards. Your rose is ready. Slide the rose nail off the wax paper and place the rose in the refrigerator to harden before using it to decorate the birthday cake.

These were three flower decorations made with icing and frosting that you can use for making a flower birthday cake. Flower birthday cakes can make anyone's birthday more special and fun.

Thursday, February 16, 2012

Make The Perfect Chocolate Cake Frosting

Allow me to introduce you to my favorite recipe for the flourless chocolate cake.  It is the real thing.  No gluten.  No extra spices or flavorings.  No added sugar.  No extra ganache needed on top.  Just a fabulously rich, decadent chocolate cake that will leave you and your friends swooning.And the best part is….there are only THREE ingredients.

And after watching it disappear with a few groups of friends this weekend, I think it’s everyone’s kind of cake!

Ingredients:
    8 large eggs, cold
    1 lb. semisweet (or bittersweet) chocolate, coarsely chopped
    16 Tbsp. (2 sticks) unsalted butter, cut into 16 pieces
    optional toppings: powdered sugar and/or berries

Method:
Adjust an oven rack to the lower-middle position and heat the oven to 325 degrees.  Line the bottom of an 8-inch springform pan with parchment paper or waxed paper and grease the sides of the pan.  (Be sure to grease the sides really well!)  Wrap the outside of the pan with 2 sheets of heavy-duty aluminum foil and set it in a large roasting pan.  Bring a kettle or pot of water to boil.

In a stand mixer using the whisk attachment, beat the eggs at high speed until the volume doubles (about 5 minutes).

Meanwhile, melt the chocolate and butter together.  You can either do this on the stove (by placing the chocolate and butter in a large heatproof bowl set over a pan of almost-simmering water until smooth and very warm – about 115 degrees on an instant-read thermometer – stirring occasionally.

Or you can do this in the microwave (by heating the chocolate in a microwave-safe bowl at 50% power for 2 minutes, then stirring, the adding the butter, and continuing to heat at 50% power and stir in 1-minute intervals until the mixture is well-melted and smooth).  Then fold about a third of the beaten eggs into the chocolate mixture using a large rubber spatula until only a few streaks of egg are visible.  Fold in half of the remaining egg foam, and then the last half of the foam, until the mixture is totally homogenous.

Scrape the batter into the prepared springform pan and smooth the surface with a rubber spatula.  Place the roasting pan on the oven rack and pour in enough boiling water to come about halfway up the sides of the springform pan.  Bake until the cake has risen slightly, the edges are just beginning to set, a thin-glazed crust (like a rownie) has formed on the surgace, and an instant-read thermometer inserted halfway into the center reads 140° F, 22-25 minutes.

Remove the springform pan from the water bath and set on a wire rack; cool to room temperature.  Cover and refrigerate overnight to mellow and firm.  (The cake can be refrigerated for up to 4 days.)

About 3o minutes prior to serving, carefully remove the sides of the springform pan, invert the cake onto a sheet of waxed paper, peel off the parchment paper, and reinvert the cake onto a serving platter.  If desired, lightly dust the cake with powdered sugar and top with berries.  To slice, use a sharp, thin-bladed knife, dipping the knife into a pitcher of hot water and wiping the blade before each cut.

Wednesday, January 25, 2012

Picking Your Wedding Cake Easily


But, you should know that the theme isn’t everything! You should make sure that the colour of your cake will also suit the atmosphere of your wedding reception, thus making your cake fit perfectly the set of your nuptials.When choosing your wedding dress, the theme, or the music of your nuptials, there are some criteria that help you make the right choice. Well, if these criteria seem to be helpful when picking these elements, we don’t see why they shouldn’t help you when choosing your wedding cake too. To be more precise, our point is that you should establish some helpful points, every time you are shopping or looking for an important wedding item. Thus, organizing your entire wedding ceremony will be feasible and you will see that it isn’t such a burden.


The first criterion is related to the theme of your wedding. For example, if you are planning on having an elegant romantic wedding ceremony, we strongly recommend you to choose a big, white, delicate cake that will totally impress your guests. To be frank, most of the ladies have a tendency towards these romantic things, and as a result the majority of cakes must have a romantic side, such as: a fancy ribbon, some adorable hearts, or even the pink romantic colour. Anyway, the point is that your wedding cake must match the theme of your wedding!

You’ll have to agree that there are some “colour rules” that must be respected, in order to have a harmonious wedding background!

And, the most important criterion of all: you should pick something that will stand for your lifestyle, preferences and character. So, if you are known for your sense of humour and your cheerful mode, then you should definitely go for a colourful, vivid and joyful cake. Important tip: if you will choose more than one colour for your wedding cake, pay attention at how you will choose to combine the shades. After all, your cake must be perfect for this special, elegant and refined event.

n the end, our last advice would be to choose your wedding cake carefully, because it is an item which must amaze and surprise your wedding attendants, both by its aspect and by its taste.